Easy
Today we’re going to create a logo and make the background transparent - and we’re going to do it with free tools.
Not free trials of paid services or programs, these are totally free tools. One of them has a paid option - but we don’t need it. We can accomplish everything for free thanks to help from another tool.
Tools We’ll Be Using
Canva 
What is Canva and how to get it
In their own words, “Canva is an online design and publishing tool”1. It’s an application that helps easily create visual content that can be used for business cards, logos, infographics, social posts, and much more. It comes with tons of free templates you can use, combine, and edit (to some extent).
Canva has 3 tiers - Free, Pro, and Enterprise. I’ve only used the free version - here’s what it offers us:
- Tons of free templates
- Ability to export as PNG, MP4, GIF, and more
- Web, desktop & mobile apps
The last point is really nice - you can edit a design on your computer (either the website version or desktop app) and pick up where you left off on a phone or tablet. You’ll need to be signed in for this feature, but this doesn’t cost anything if you’re using the free version.
Some limitations of the free version:
- Export size limitations
- Cannot remove the background of designs
- Cannot export as SVG
So we’re restricted a bit, but that’s not unexpected from a free version of a tool. We can’t blow the image up to a large scale, export it as an SVG, or make the background transparent to name a few - all things we’d probably want to do. Luckily, we can get around these limitations with some other tools.
Ok, enough chatter. Click here to head over to Canva’s website, then click the “Get Canva Free” button. It will ask you to log in or sign up (no credit card needed). You can also download the desktop app (if you’re on a laptop or desktop). If you’re on a phone or tablet, search for Canva in the app store to download it and get walked through the login/sign up process.
Creating a logo in Canva
Let’s create a simple light bulb logo. First, take a look at the tool itself and create a new blank logo template:
![]()
Canva automatically opened the last project I was working on (this site’s branding stuff). But let’s start from scratch. Click the “plus” icon in the top toolbar as shown, then create a new logo template type by selecting “Logo”:
![]()
Select the “Elements” tab on the left-hand side of the app, then search for “light bulb” to find some images to choose from.
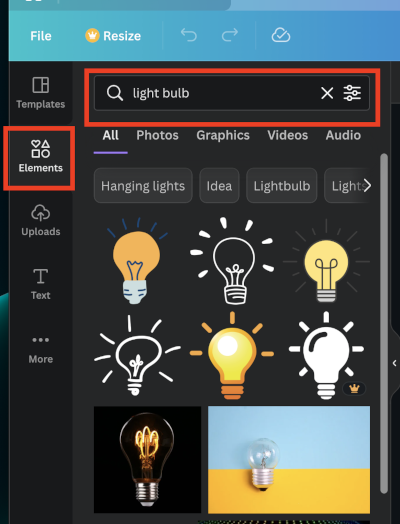
Now, pick whatever logo you’d like. For this example, I chose the first one in the search results. When you click the image you want, it drops into the workspace area on the right.
Let’s make the image take up as much space as possible by dragging the resize bars to the top and bottom of the page.
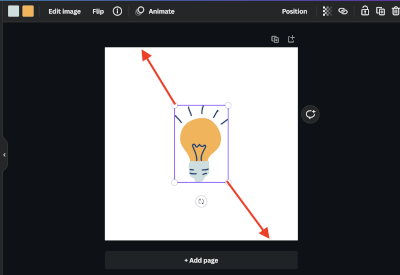
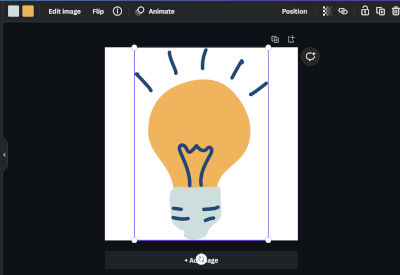
At this point you could alter the image if you wanted. You can change the colors (for some elements), alter the background to anything but transparent, and even add more images or text to the page.
Downloading the logo
Now that we have the image selected and resized, we want to make the background transparent. Unless we have a paid account, we cannot do that in Canva.
To get around this limitation, we have to get the image out of Canva. In the upper right of the desktop app (and iOS app) is a share button and/or icon. Click it to see the “Share this design” window:
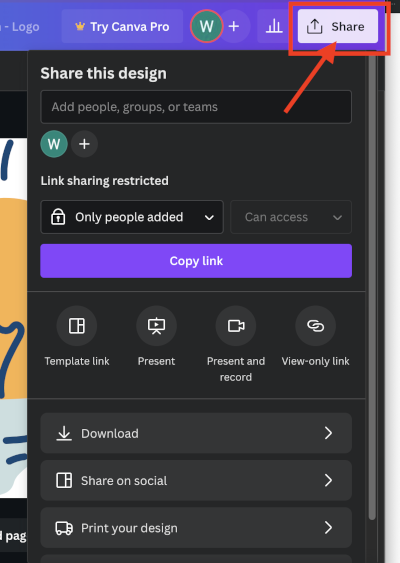
Select “Download” to see the next set of options:
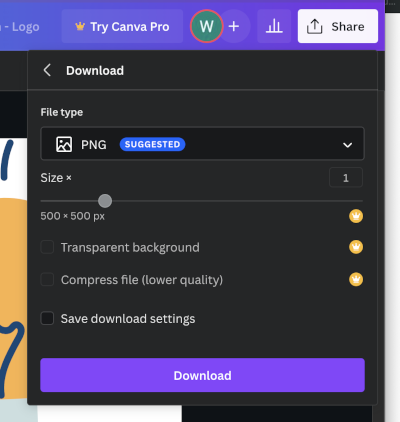
Since we’re using the free version, we are only able to download at the 500 x 500px size. We also cannot make the background transparent (we already knew this). In the “File type” drop down, we can download as any file type except SVG (figures, right?). Select PNG as the file type, then click the “Download” button. You’ll be able to choose the save location and give it a filename.
We'll open this image in a different tool - but first we need to get that tool. Enter GIMP.
GIMP 
What is GIMP, why we need it, and how to get it
GIMP stands for GNU Image Manipulation Program, and it’s a “cross-platform image editor”2. Think Photoshop, but free (!!). It’s a very powerful tool that can do tons of cool things.
Because it's so powerful, GIMP can be overwhelming at first glance. So once we get into the tool, let's just focus on one thing at a time.
Since Canva’s free version doesn’t allow us to remove the background (aka make it transparent), we need a tool that can achieve this. GIMP can do that and much, much more.
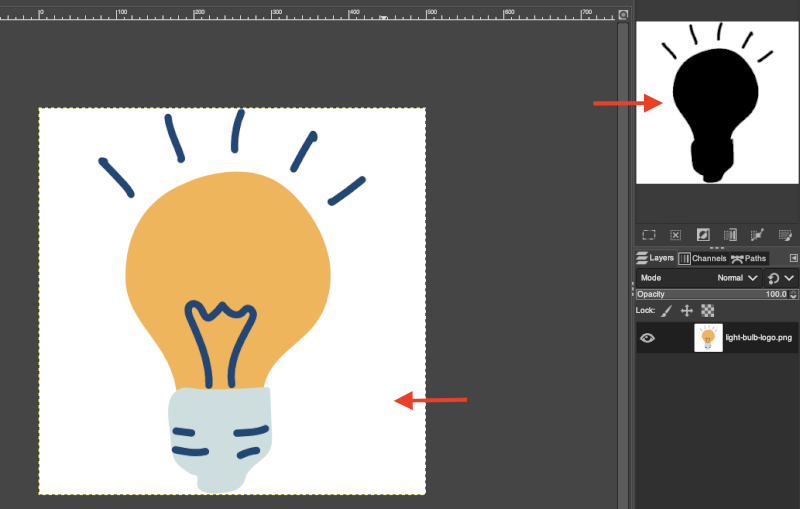
Why make the background transparent, you ask? It will look better. This is how the image would look against a darker background right now:
Ideally we’d like to only see the darker background and the light bulb image, not the white box that surrounds the image. Without editing the image, we’re stuck with that white box.
Imagine you’re trying to put this logo on a shirt, and that shirt is any color other than white - it wouldn’t look quite right. So let’s get GIMP and remove it.
Click here to head to GIMP’s homepage and click the red Download button. It should walk you through the installation process.
Once complete, fire it up so we can import the light bulb logo for editing.
Importing our logo into GIMP (and a quick tour)
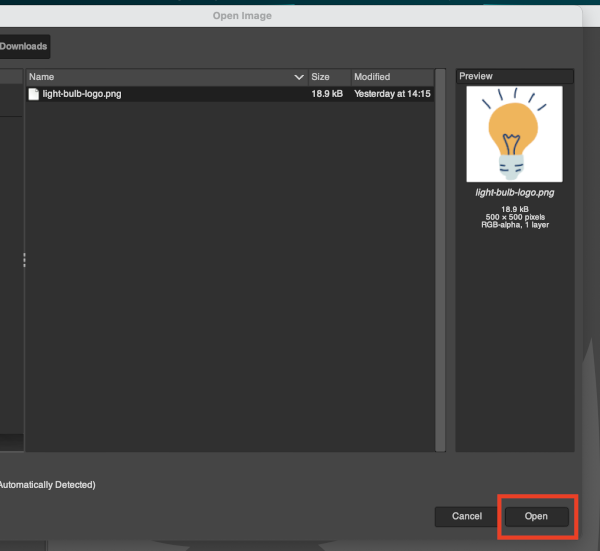
To open the logo, go to File → Open → and browse to where you saved the logo. Select it, then click Open.
Now we should have the image opened in GIMP. Before we look at the overall workspace, let’s make sure some helpful windows are docked in GIMP.
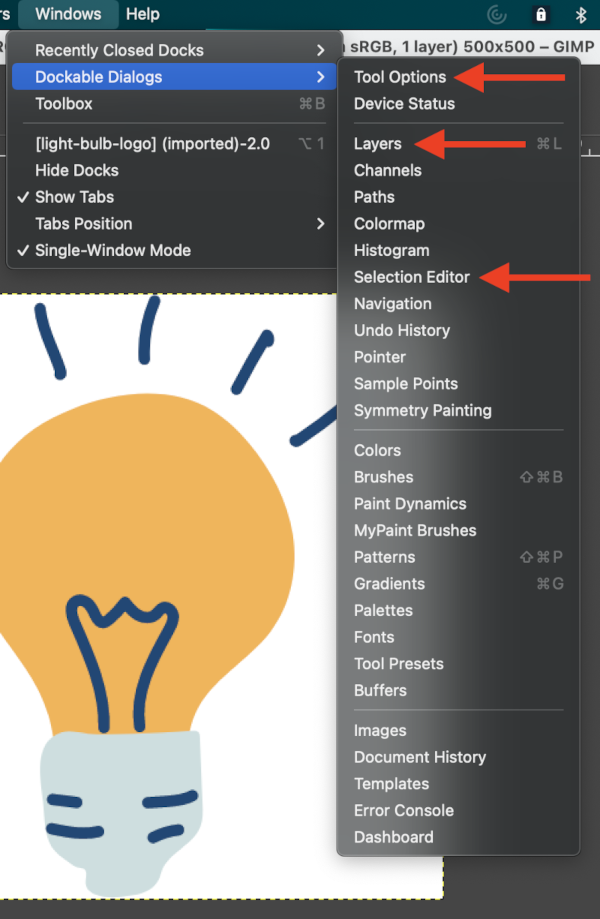
Go to Windows → Dockable Dialogs and you’ll need to make sure you select the tools listed below. Note - you may have to select them one-by-one.
- Tool Options
- Layers
- Selection Editor
Once docked, they may show up in the left- or right-hand side of your GIMP tool. Here’s a brief look at them:
Tool Options
Configure the tool being used. Example: changing the size of the paint stroke. Think paint brush sizes.
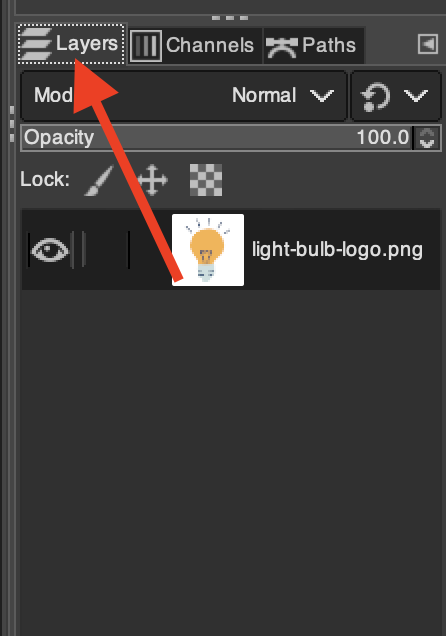
Layers
Some images have layers of content you can edit. Think lasagna, but you can easily change the layers.
Selection Editor
Select certain parts of the image, and verify the selection with this tool.
Below is what my full GIMP window looks like. I have some other tools docked, and they stack into tabs. But the tool windows I have open are the ones we’ve just docked together.
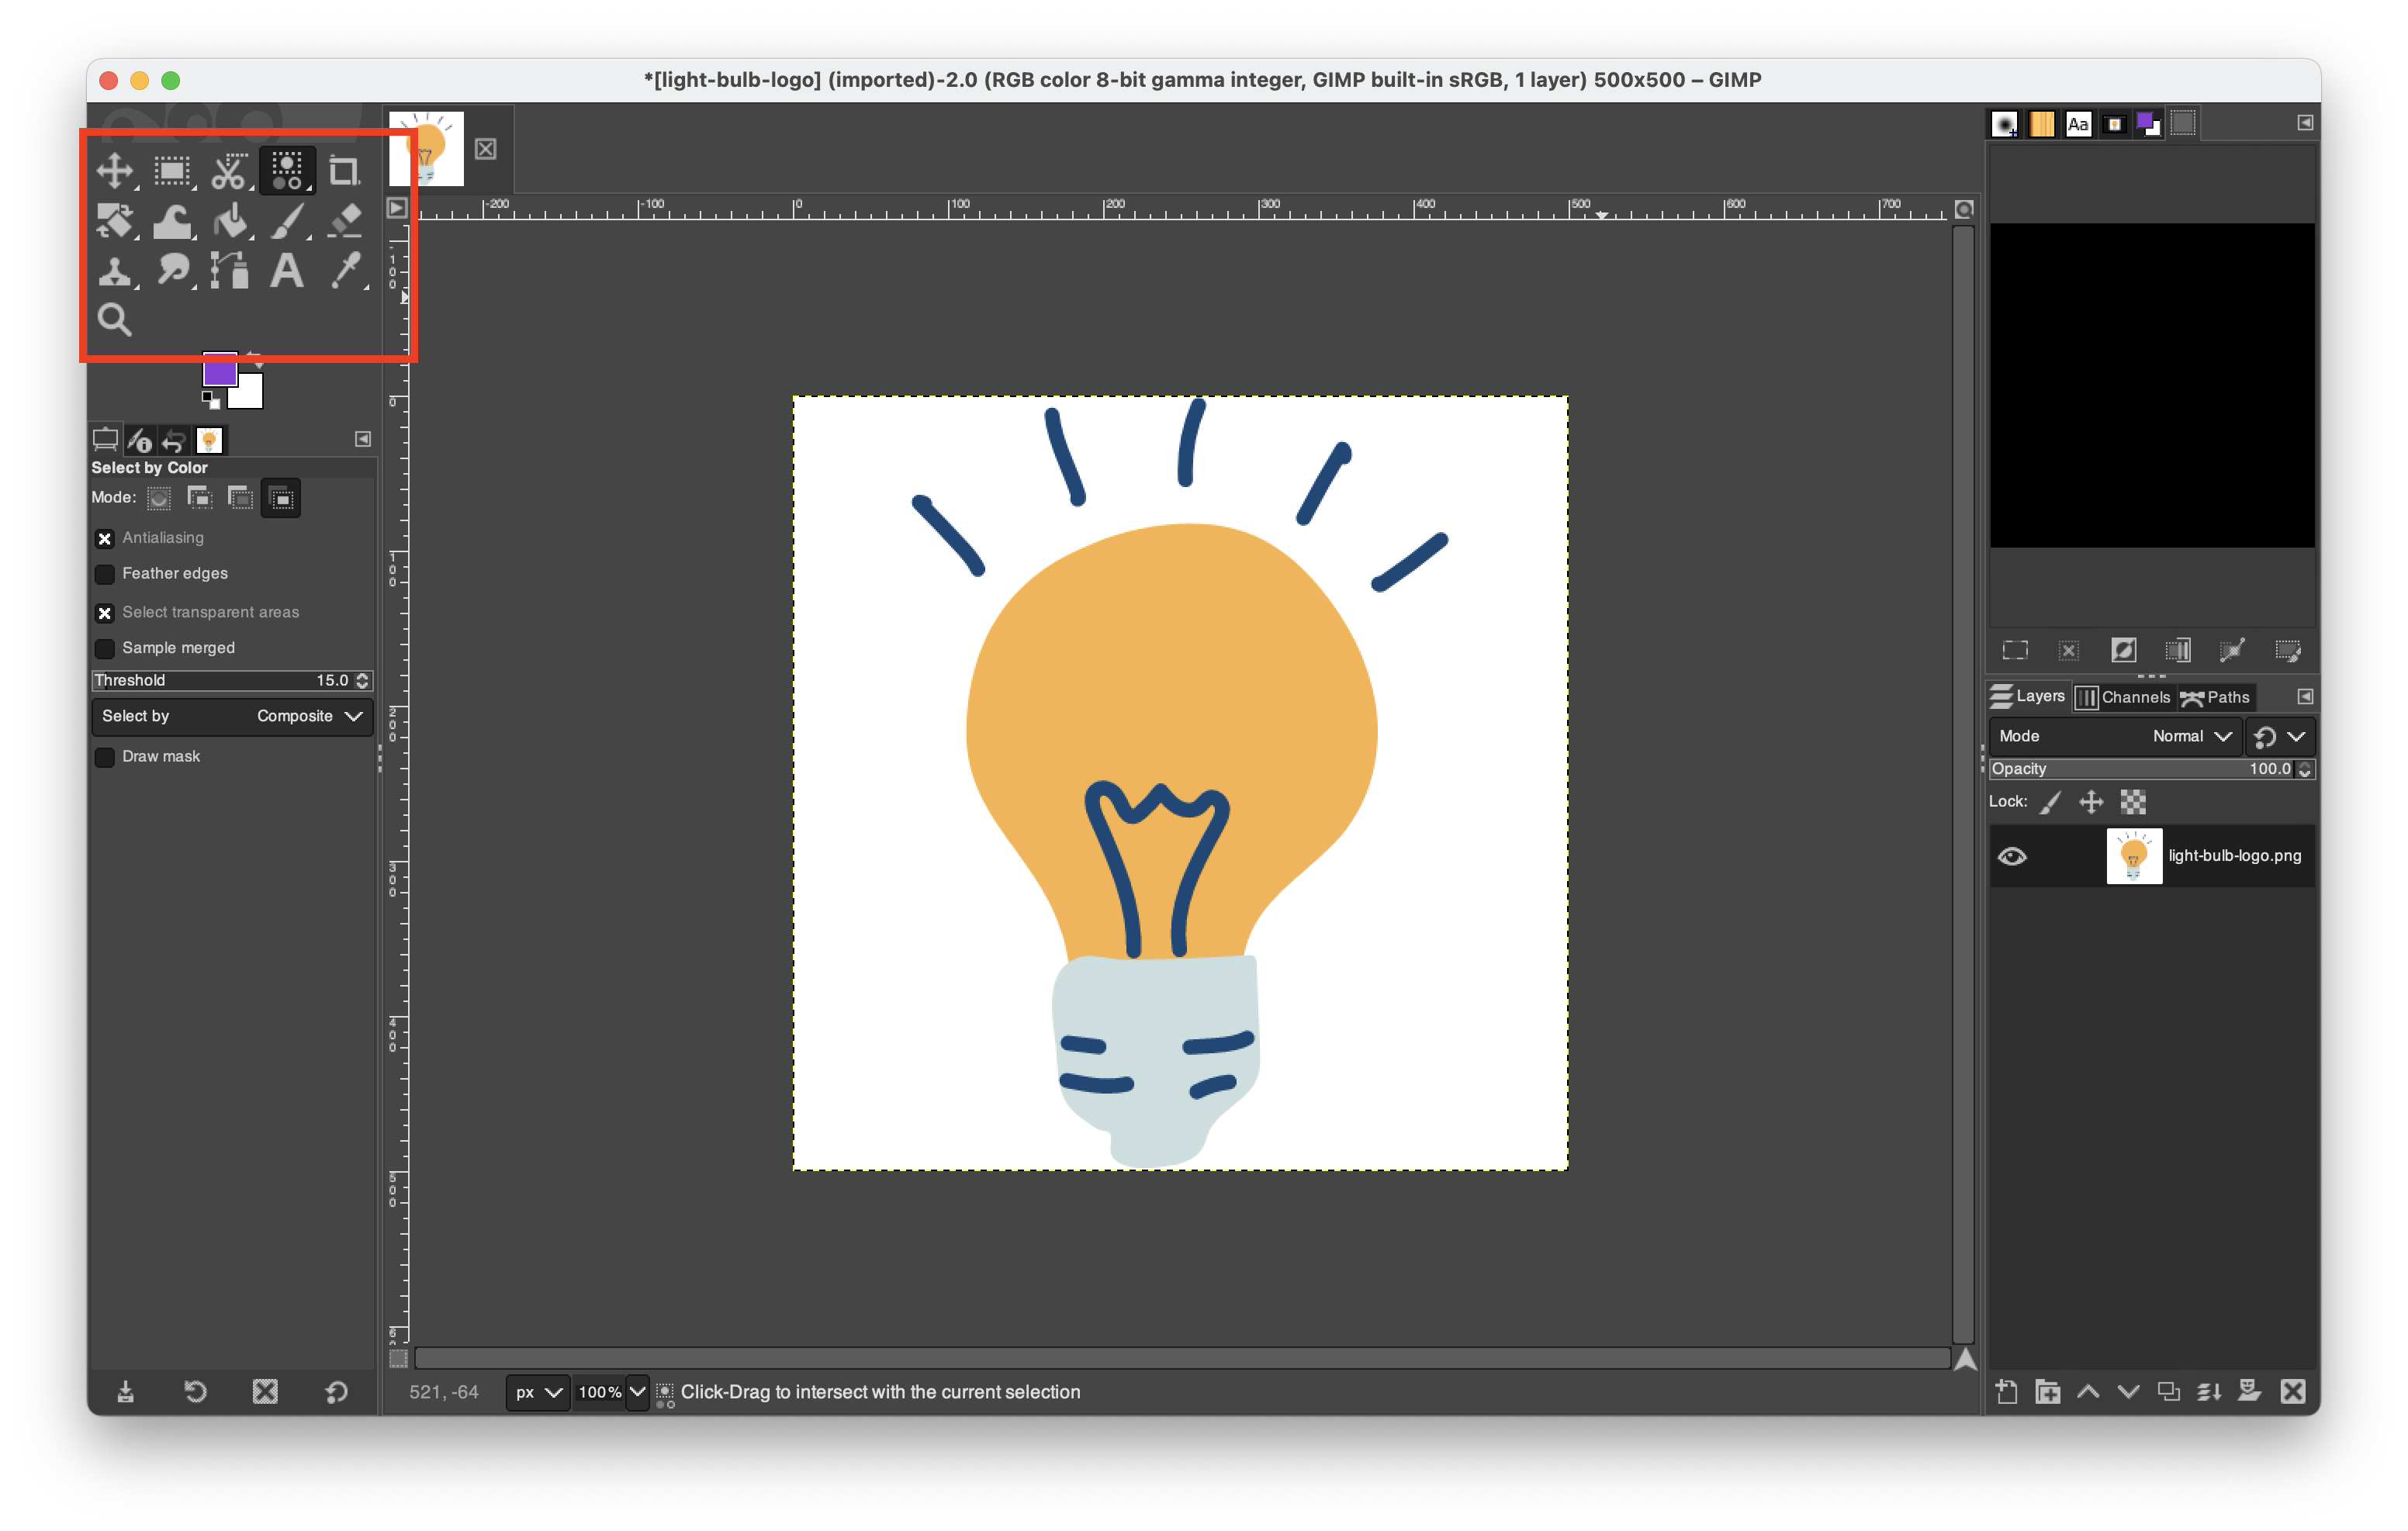
I’ve called out the upper left part of the window. This area houses the main GIMP tools. Want to paint a blue line? You’ll find the paintbrush tool here. Want to erase something? The Eraser tool is here too. This is where we’ll find and select the tools to edit the image.
Editing the logo in GIMP to create a transparent background
To remove the white background, we’re going to need to perform a few steps in order:
- Select the background color with the Select by Color Tool
- Verify our selection with the Selection Editor window
- Erase the background color with the Eraser Tool
It’s a little more complex than that, but not much.
Select the background and verify the selection
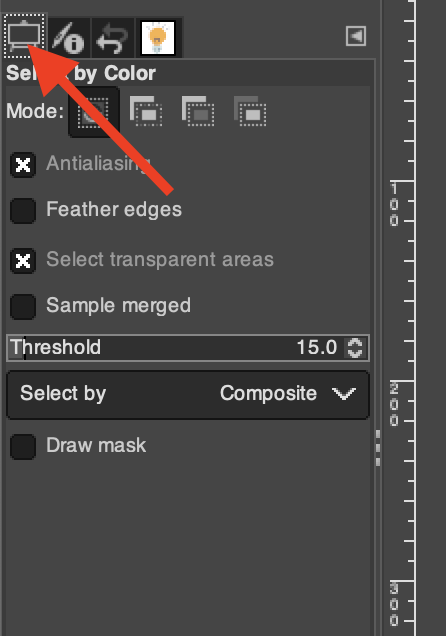
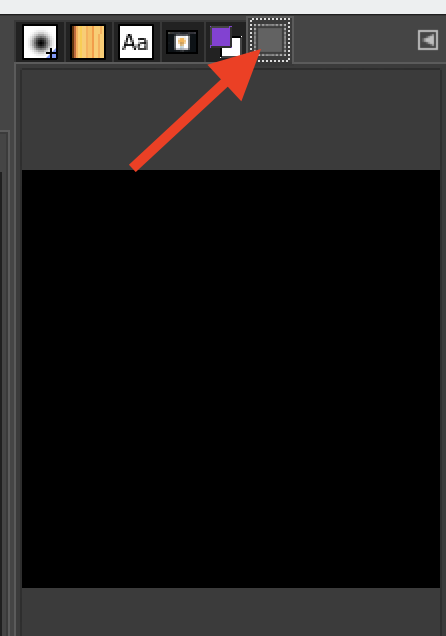
In the upper left part of GIMP (the area I called out in the last image), find and select the Select by Color Tool. See the image below for what it looks like - you can also hover your mouse over the tools to see their names.
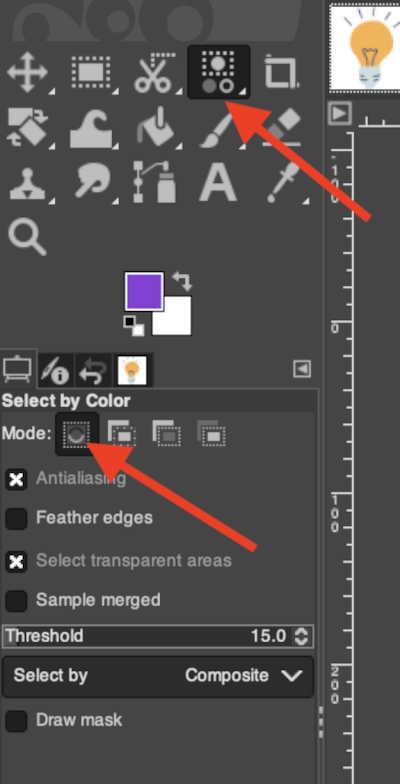
Once it is selected, verify that the Mode for the tool is “Replace the current selection” as shown by the other red arrow in the image above.
Now, click in the background of the image (the white area for me). It may not look like anything happened. We verify the selection by checking the Selection Editor window, which should look like this:
The Selection Editor window will show two colors - black and white. The white parts of the image are the colors currently selected. The black parts are the colors not selected. Click in different colors with the Select by Color Tool to see how the selection changes to get a better understanding.
Removing the background via the Eraser Tool
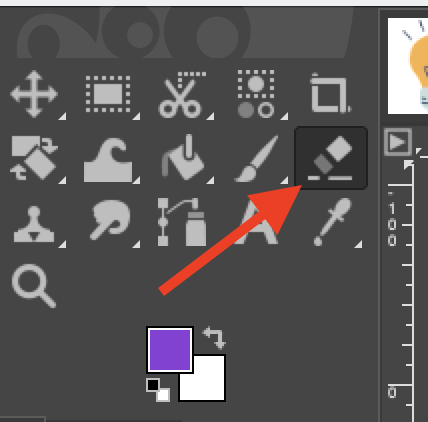
Now we can remove that pesky background. Select the Eraser Tool in the upper left part of the GIMP window:
Now verify the tool’s options. Below you can see that I have my Eraser’s Size set to pretty large. This allows me to erase a lot with fewer strokes. And since we’ve selected the areas we want to target for erasing, we don’t have to worry about erasing any colors other than white. I also have the Opacity and Hardness set to 100 (max).
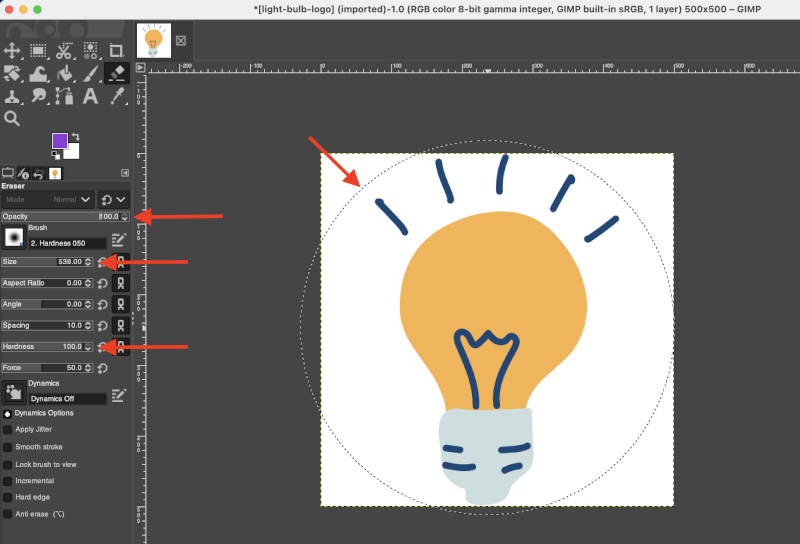
See the arrow pointing to the dotted circle in the image above? This is the size of the stroke based on my settings. Nearly the whole image fits inside it!
If your logo image also has white in it, you'll erase that too if the Eraser stroke passes over that area. You can make the Eraser's size smaller to make more careful, targeted strokes.
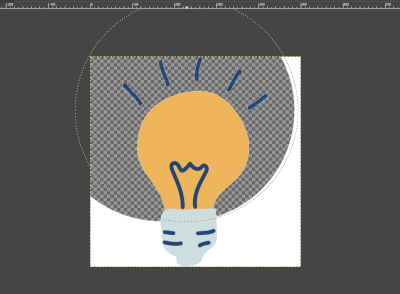
Now that the Eraser tool is selected and ready, click and hold as you drag the mouse over the image until the background is removed. You should see a checkered background where the white was:
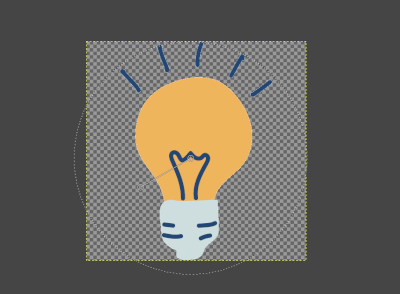
That’s it. We’ve just removed the white background from the image. All that’s left is to export (save) the new image!
Saving the final image
Almost done. To save our image, go to File → Export As… and you’ll be brought to a window similar to when we imported the image.
We can leave it as-is and it will overwrite the original image as a PNG, Or we can name it something else - your choice. I’ll rename mine to show a before and after picture. When you click Export another window will pop up with some options - here are mine:
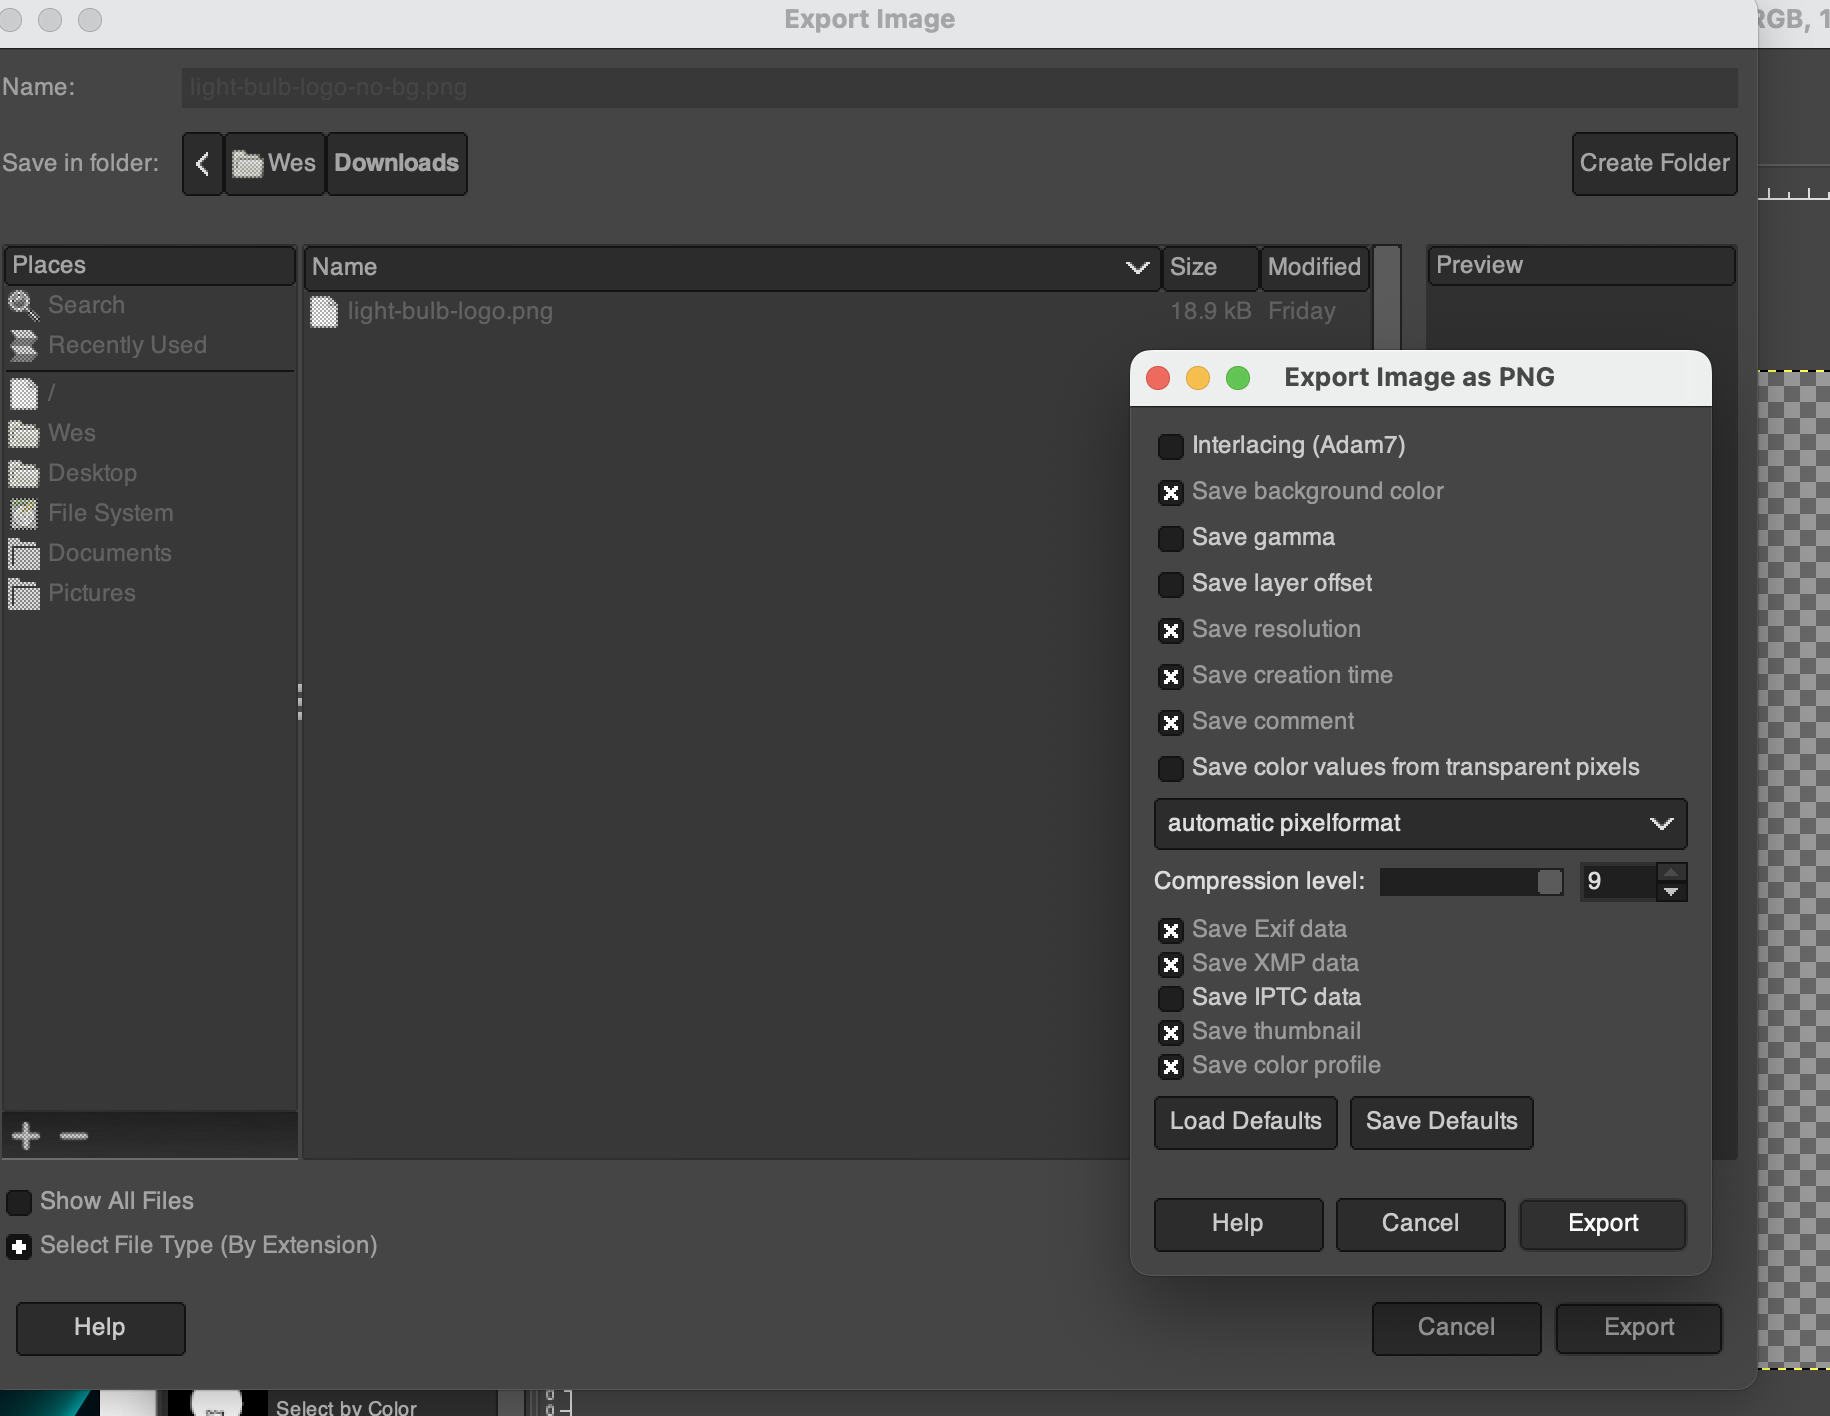
Click Export again to save the new image. Now we can use this new image wherever we want without worrying about the white box background. Here’s the before and after:
Summary
You don’t need to pay for premium versions of tools to accomplish professional results. There were a lot of step-by-step instructions, but essentially we:
- Found an image/logo in Canva and exported it
- Used GIMP to select the background and remove it
And we barely scratched the surface of what these tools can do.